ASEI Lesson Plan On Cultural and Creative Art
Printmaking
Theme: Arts and Crafts – Crafts
Topic: Print-making (Leaf and thumbprint)
Sub Topic: Print-making
Date: dd/mm/yyyy
Class: Basic Four
Duration: 35 Minutes No of Learners: 30
Learning Objectives:
By the end of the lesson learners should be able to:Explain the meaning of print.
Printing is the process of reproducing the design on a desired surface.
It can also be defined as the creation of artistic design from which many images are made.List types of print.
There are four types of printmaking. These are- Relief printing: This printing from a raised surface is a process of making a print from relief objects such as wood and leaves. A simple example of relief printing is a rubber stamp pressed into a stamp pad and pressed onto a piece of paper. We can also make relief printing by drawing your design with a knife or blade on objects such as wood, cardboard, linoleum, styrofoam etc. .
- Intaglio (Engraving): This describes prints that are made by cutting the picture into the surface of the printing plate.
- Lithography (Planography): This is the printing of a flat surface (stone or metal plate)
- Stencil (Serigraphy): A stencil is a sheet of paper, fabric, plastic, metal or other material with designs cut, or punched from it. Ink is forced through the openings onto the surface to be printed.
An example of stencil printing is silk screening.
Explain leaf printing and thumb-printing as types of printmaking.
Leaf printing
Is the process of printing or making the design of a leaf on another surface. To do this, ink or dye is put on a leaf which is then put on another surface. The shape and features of the leaf are now shown such surfaces, which could be either paper or fabric.
Thumb-printing
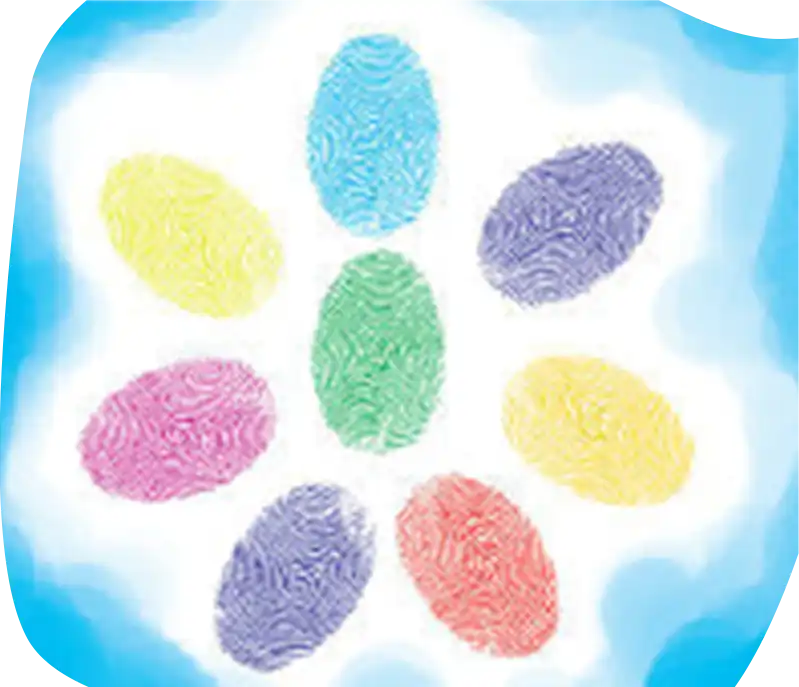
Is the process of transferring the pattern on the human thumb to a surface as a design. Ink or dye is put on the thumb which is then pressed on a surface of paper or fabric (cloth).
Explain/list suitable leaves for leaf print.
Since the process involves the transfer of the design pattern on the leaf to another surface, the leaf to be used should have the following qualities.- Fresh leaves are recommended because dry leaves break easily.
- The veins of the leaf must be prominent and hard. This affects the outcome of the print. The bolder the veins are, the clearer the prints would be.
- The shape of the leaf affects the beauty of the print. Hence, the leaf to be used for the print must be carefully selected. If two or more leaves are to be used, their shapes must be different. E.g, Bitter leaf, mango leaf, orange leaf, guava leaf, etc
List the items required for leaf /thumb printing.

- Paper/cloth.
- Ink or poster paint.
- leaves/ flowers or your thumb.
- Rollers or brushes.
- Paint trays.
- Heavy object or hands for pressing.
List the steps involved in making a leaf print.
- Select a suitable leaf for leaf print:
The leaf should be fresh and with a beautiful shape with well-defined veins. Add a good dollop of ink or paint to your tray, we then used our rollers to roll the ink out over the tray to give a nice even covering but can also use a brush to even it out. - Take the assortment of leaves and colour the Leaves with washable marker pens.
Take a leaf and colour the underside of it in with felt pens. It can look beautiful if you colour in stripes of the rainbow but you can choose any patterns or colours you prefer. Make sure your colours each area well, covering all the leaf. Go over each section a couple of times to get really good coverage. There is no strict rule about the arrangement of the print design on the paper during the printing process. It depends on the general shape one intends to have. - Press Down on the Leaf:
The leaf with paint on it is carefully placed on the paper/cloth and minimal pressure is applied to transfer the print impression to the paper. There is no strict rule about the arrangement of the print design on the paper during the printing process. It depends on the general shape one intends to have - Lift Off to Reveal Your Leaf Print:
Once you have pressed your coloured leaf down well onto your paper lift it gently away to reveal the wonderful print. You can repeat the process with different leaves with varying shapes to build up your picture. List the steps involved in making a thumbprint.
- Apply paint of the preferred colour on the thumb.
- Transfer the thumb impression to the paper surface.
One is free to decide the arrangement of the thumbprints on the paper. The print can be done with different colours depending on the preference of the learners, and this should be encouraged.


Rationale:
Print-making is a fun and magical activity for students to discover and experiment with. Altered prints give them a bit more freedom to take chances and play with colour and design. Enjoy the process along with them. Celebrate the differences in their prints. They may all be creating the same subject, but each print is as unique as they are.
Prerequisite/ Previous knowledge:
Students have been taught the creative use of colours and textures.Learning Materials:
Stamp, Stamp pad, Plain A4 papers, Posters, Wallpapers, Ink/poster paint, Leaves and flowers, Paint trays, Rollers/ brushes, Flashcard, A whiteboard and pens.Reference Materials:
- CULTURAL AND CREATIVE ARTS for Primary Schools Book 4 By A. K. Badaru, C. Ndubuisi, G. Akinsola et al.
- Online Resouces.
Lesson Development:
| STAGE | TEACHER'S ACTIVITY | LEARNER'S ACTIVITY | LEARNING POINTS |
|---|---|---|---|
| INTRODUCTION full class session (5 mins) | The teacher asks the learners to list the uses of colours. | Learners listed the uses of colours.
|
Revising the previous lesson on the creative use of colours and textures. |
| DEVELOPMENT Step 1. Group Work (2 mins) | The teacher guides the learners to form four groups and asks them to choose their leaders and secretaries. | Learners choose their group leaders and secretaries. | Inculcating leadership skills, competitive spirit, cooperation, teamwork and a sense of responsibility among learners. |
| Step 2 Activity (3 mins) | Guide learners in activities that lead them to the definition of printmaking. The teacher gives the four groups printed copies of a material and asks them that in her hands is the original copy of the material they are holding, while in their hands are the printed copies. The teacher asks learners to define printing in their own words. |
Learners expected response; Printing is the process of reproducing several copies of a design on the desired surface. |
Developing the concept of the topic from the activity. |
| The teacher again engages the learners in an activity. The teacher gives a stamp, stamp pad and plain A4 paper to each leader of the group and asked each group to transfer (print) the image on the stamp into the plain A4 paper. The teacher writes the topic "Printmaking (Leaf and thumbprint)" on the board and asks the learners to list any other thing within their possession they can print. |
Learners press the stamp on the stamp pad and transfer and press it against the plain A4 paper to transfer the image of the stamp into the plain A4 paper. Learners list other things that can be printed;
|
Types of printing. Developing the process of printmaking from the activity. 
|
|
| The teacher asks learners to define leaf printing and thumb printing in their own words. | Learners are expected to respond:
|
Definition of leaf printing and thumb printing. | |
| Stage 3 Full class discussion (10 mins) |
The Teacher explains to learners that not all leaves are suitable for leaf printing, the teacher guides and displays before the learners with demonstration and examples of suitable and non-suitable leaves printed on desired surfaces. | Learners follow the teacher's explanation and listed suitable leaves for leaf print.
|
Developing the idea of suitable leaves for leaf print. |
| Step 3 Steps involved in making a leaf print (5 mins) |
The teacher asks and guides the learners, following the steps taken to transfer the image of the stamp to the plain A4 paper and list the steps involved in making a leaf print. | learners expected to respond:


|
|
| Step 4 Steps involved in making a thumb print. (5 mins) |
The teacher asks and guides the learners, following the steps taken to transfer the image of the stamp to the plain A4 paper and list the steps involved in making a thumbprint. | Learners are expected to respond;
|
One is free to decide the arrangement of the thumbprints on the paper. The print can be done with different colours depending on the preference of the learners, and this should be encouraged. Steps involved in making a thumbprint. |
| Evaluation. Full class session (5 mins) |
Ask the following questions to evaluate the achievement of the set objectives.
|
Learners expected response:
|
Confirming the achievement of the set objectives. |
|
| Conclusion, full class session (3 mins) | Ask learners to create similar prints shown on learners' activity. The teacher summerise the lessons and marks the learner's notes. |


Learners use their creativity to think of different ways to make prints. Learners copy and submit their notes for marking. |
Leaf printing is a simple way to produce some beautiful pictures. Acquiring/ improving understanding of printmaking. |
| ASSIGNMENT | The teacher gives learners a take-home.
|
Learners answer other questions. | Improving their level of understanding of Printmaking (Leaf and thumbprint). |